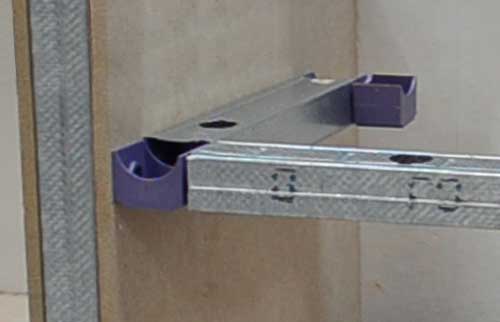
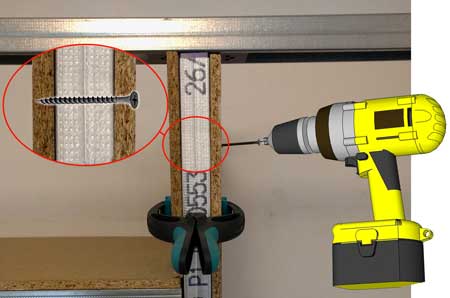
This tip is useful when one of panel board is facing the hollow side of the stud. We use screws long enough to pass through the first panel board plus the thickness of the stud, but not beyond the second panel
board. To secure the assembly, the screws are positioned on one side and the other (right figure).
This avoids the need to install small rails as described above.
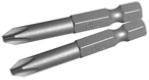
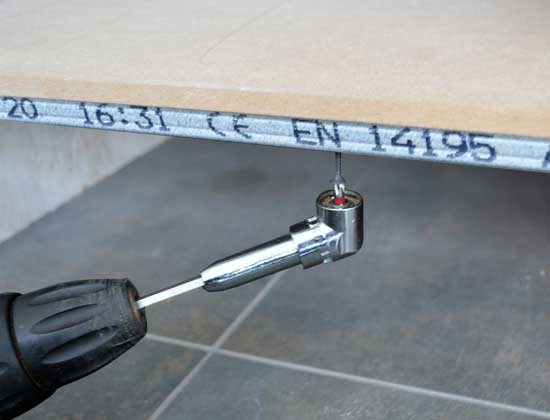
Use a right angle drill adapter
When there's not enough room to screw in, a right angle drill adapter comes very handy
It is attached to the chuck of the screwdriver, which allows the screwdriver bit to be offset by about 90°, thus allowing access to narrow areas.
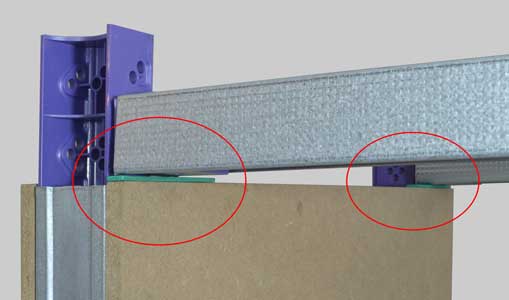
precisely adjust dimensions
Because a wall is never perfectly straight and a cut is never perfect, our wooden shims will allow you to precisely adjust the dimensions and levels of your constructions to the millimete.
In order to be able to install the panels (especially the horizontal panel), do not use shims larger than the panel thickness.
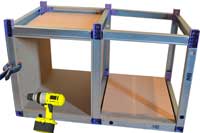
Very rigid assembly
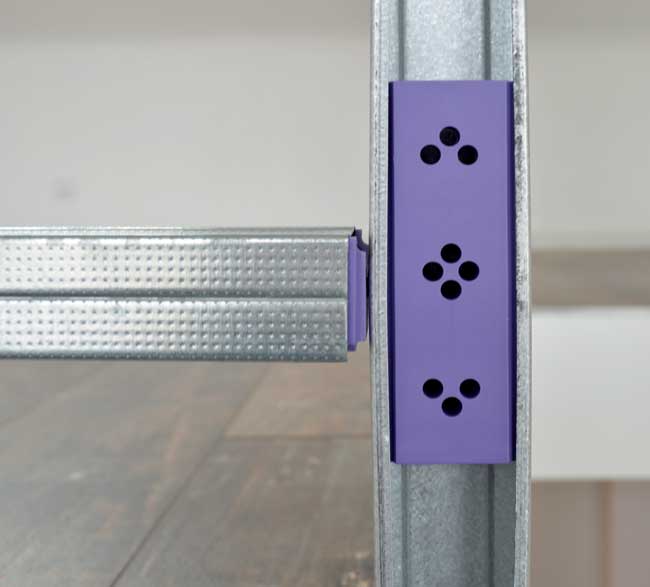
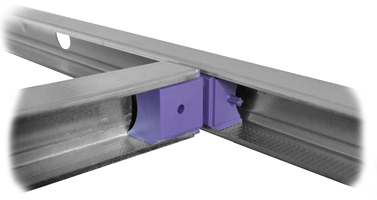
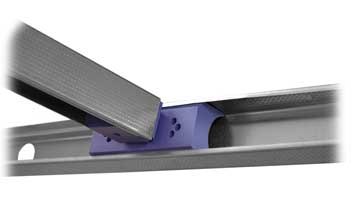
In some cases, for reasons of solidity or rigidity, it is preferable not to cut the vertical studs which supports the entire construction.
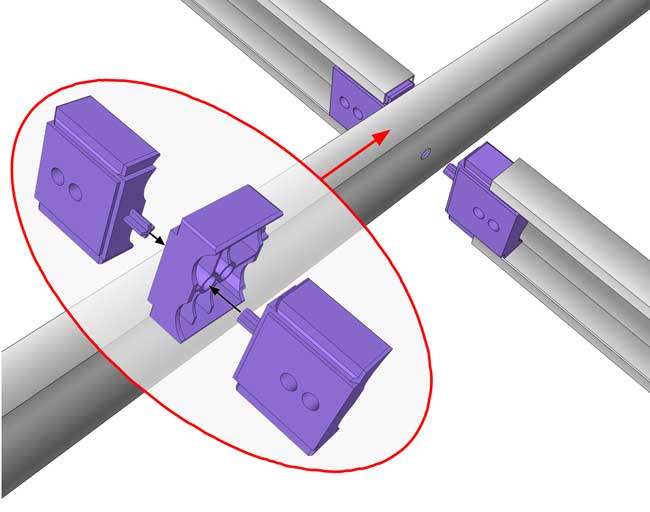
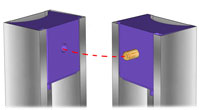
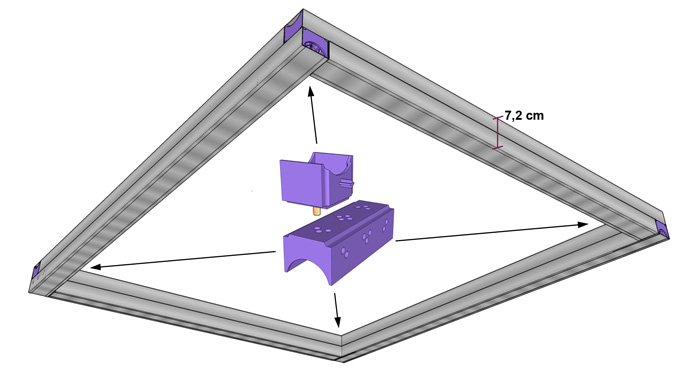
To create an assembly, simply drill the side of the studs which will allow the small Kinook block to be assembled in the large block through the C-stud and thus create a junction for 2 C-studs.
We will drill to a diameter of 10-12 mm which will allow the large Kinook block to slide in the C-stud in order to be able to adjust the levels properly.
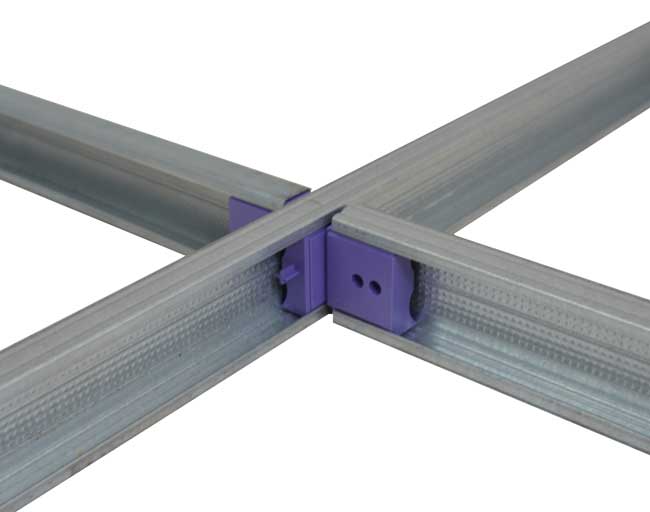
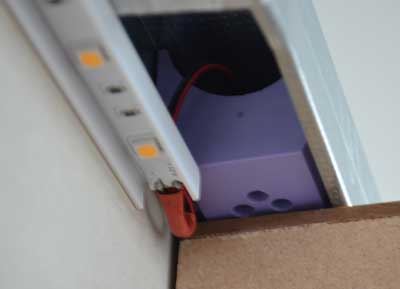
In the same way, a hole can be drilled in a lining channel to create an assembly of 3 X-shaped furrings. Example: create a modern led ceiling-light
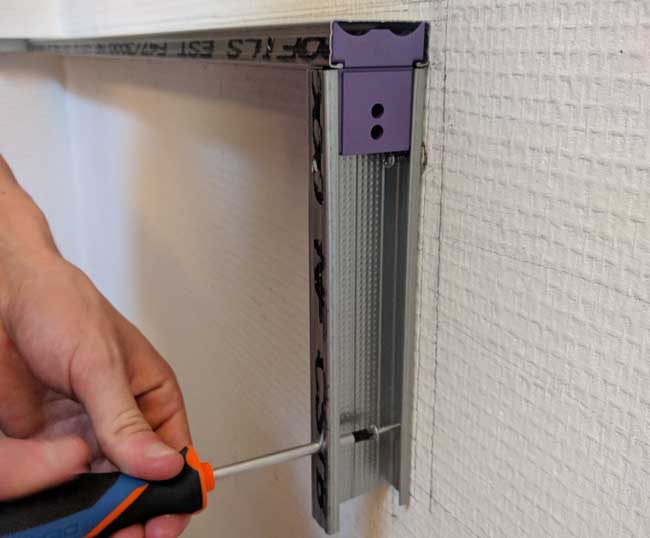
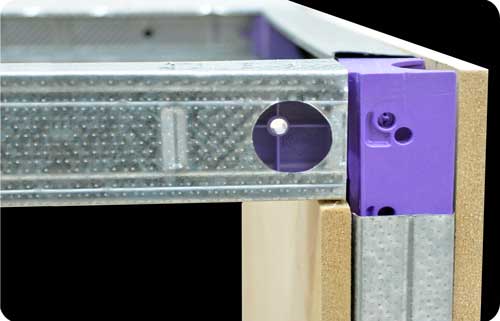
To create narrow shelves, fix the narrowest side of the studs against the wall.
with a C-stud the width will be 36 mm, with a lining channel it will be 17 mm.
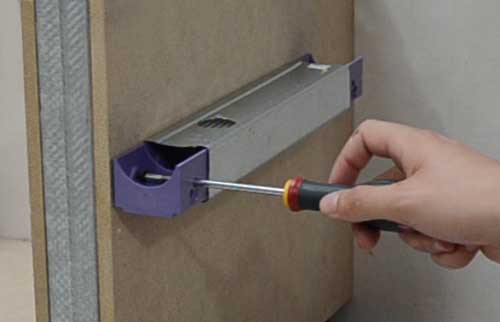
To fix the C-stud to the wall, simply drill it on both sides with a 4mm diameter drill bit, allowing the screw to be inserted on one side and the screwdriver on the other. The stud can then be screwed firmly into the wall.
A trick is to make the pre-drill hole by screwing and unscrewing a screw at the drilling location.
Choose flat head screws to secure the profile to the wall. See exemple.
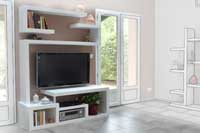
Quick and easy shelves
Insert two long Kinook blocks at each end of a C-stud. Use the holes in the block to screw them to the panel. Insert a small Kinook block and from there, assemble the metallic structure of the shelf.
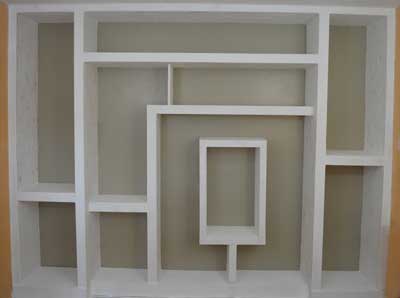
Shelf divider
This technique allows to quickly and precisely build series of shelves inside a piece of furniture, for example in a bookcase.
based on the stud type and positioning, the divider thickness can be either:
48 mm (C-stud on its largest side)
36 mm (C-stud on its narrowest side)
17 mm (Lining channel)
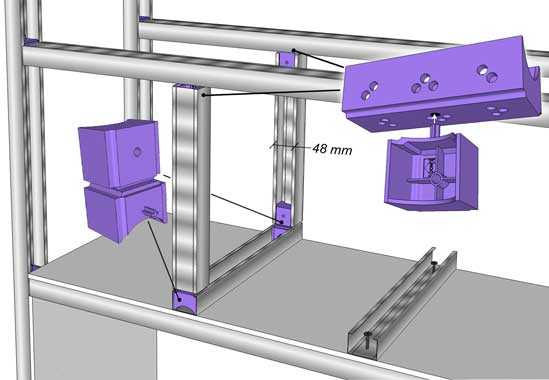
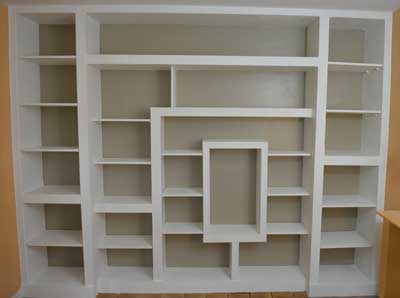
Large style (48 mm)
A piece of C-studs is fixed on the horizontal panel for each divider.
Note that a large Kinook block must be inserted in the upper horizontal studs for each divider.
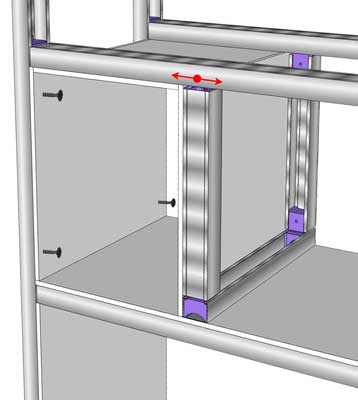
The upper side is mobile and can be adjusted precisely to the panels dimensions.
As for the installation of a closet layout, the horizontal studs are assembled to the vertical studs with 2 small Kinook blocks.
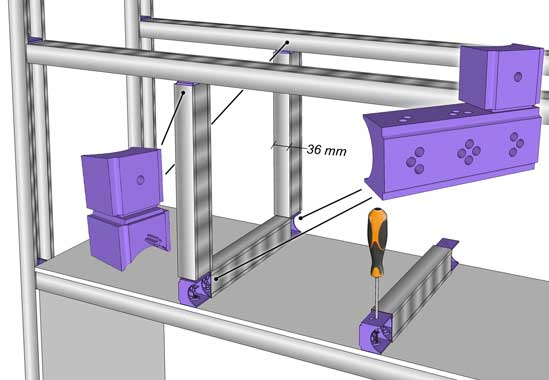
Narrow style (36 mm)
The C-studs is positioned on its narrowest side.
We use 2 large Kinook blocks to fix a studs into the lower panel as shown on the picture above. The connection with the top studs is created with 2 small Kinook blocks.
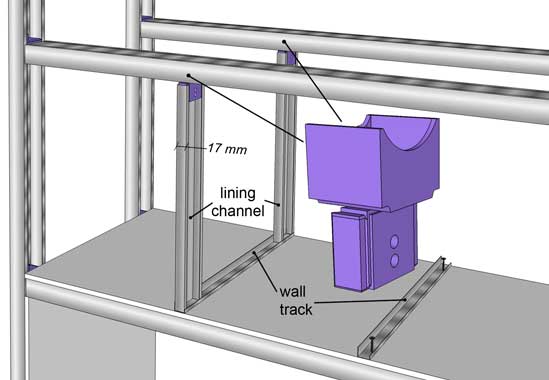
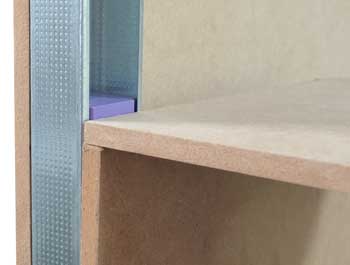
Very narrow style (17 mm)
For even thinner divider, we use lining channels. A piede of wall track for lining channel is fixed on the lower part of the shelf
onto which the vertical lining
channels are
crimped. The connection to the upper horizontal stud is done with a small and a mini-block Kinook.
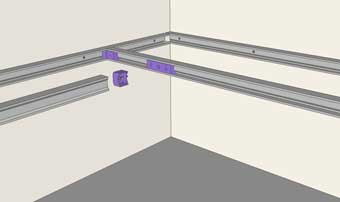
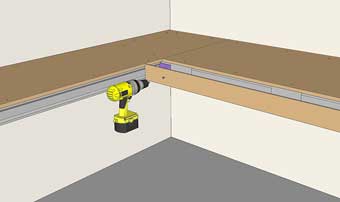
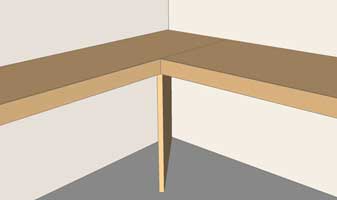
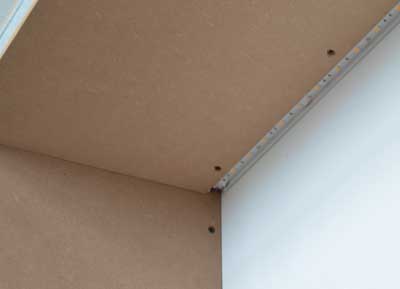
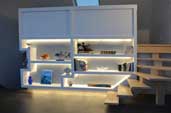
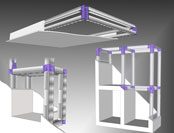
Wall mounted corner shelves
This construction technique can be used to create corner shelves or build a desk in a room corner.
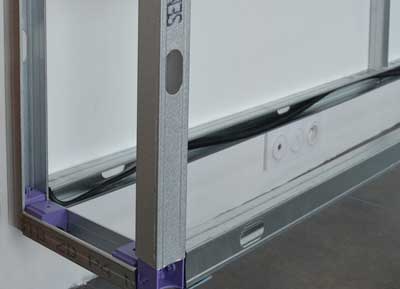
Fix the studs in the wall
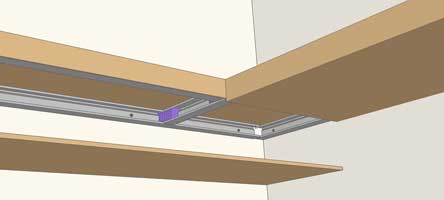
Build the metallic structure
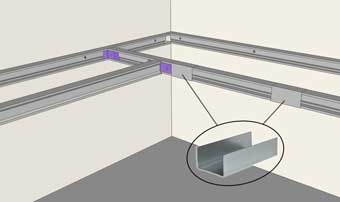
Install the panel boards. Notice that the first panel covers the structure junction: this will strengthen the construction
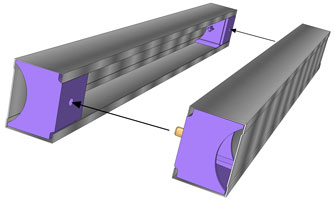
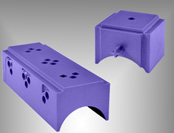
Kinook blocks allow you to easily assemble two C-Studs togethehttps://www.kinook.biz/howto-build-TV-standr.
Simply insert a Kinook block inside each stud and plug them together (see picture below).
The blocks can slide inside the stud, making it easy to position them wherever needed.
Tip: If you have already fixed a stud, don't panic, just push apart the stud sides and push a small Kinook block inside (see video below).
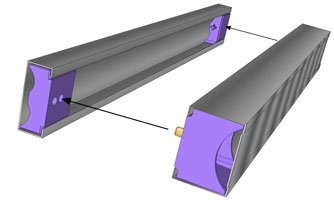
The numerous holes in the long Kinook block allow to position the studs either horizontally or vertically (see picture below)
2 studs positioned vertically
one stud positioned horizontally, one vertically
Join two studs "back to back"
Using 6 mm wooden dowels it is possible to join two studs "back to back" which can be very usefull
for certain constructions.
Join two C-studs
C-stud and lining channel
example:
create a false ceiling to conceal water and electrical conduits
To disassemble an assembly of two or more Kinook blocks without breaking them, the simplest way is to insert a screwdriver at the junction between the blocks to separate them from each other.
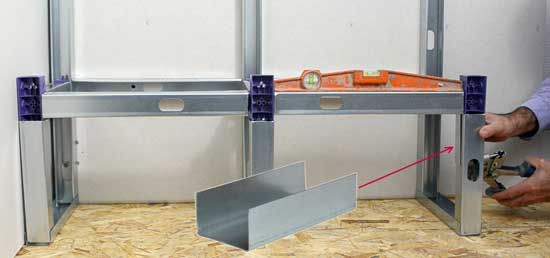
Using small track
In some situations we might need to plug the hollow side of the C-Stud to provide a support for panel boards. For this purpose, a little piece of track (9 to 12cm
long) is crimped to the C-studs (see video).
Small pieces of track stud can also be used to secure the metallic frame once all levels have been adjusted.
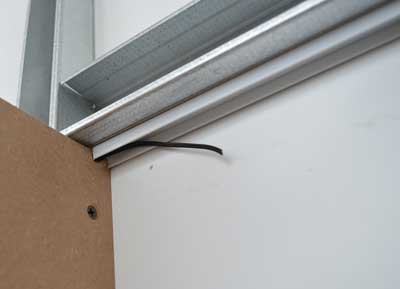
Construction built against a wall
For constructions built against a wall, start by tracing the construction outline onto the wall.
This will guide the installation of the C-studs on the wall and also provide a realistic view of the construction dimensions and proportions. Adjust as needed.
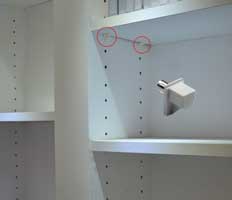
Locate studs inside a wall
With a small detector, metal studs or beams can easily be located inside a wall or a ceiling to securely attach a frame or screw the metallic structure of a lighting box or other
construction.
Adjustable shelves
For built-in bookcases or shelves, it may be interesting to create adjustable shelves adapted to your different book sizes.
Shelf brackets
Shelf brackets are available in many different shapes and sizes. The technique is to insert two brackets at the desired height at each side of the shelf.
Use pre-drilled panels (from store-bought shelf kits) or drill the side vertical panels to the desired dimensions yourself. Plasterboard cannot be used for this purpose as it is too fragile. Use wood, melamine, MDF etc.
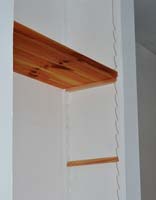
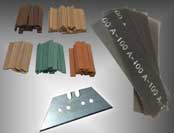
Saw-tooth pattern strips
The saw-tooth pattern strips are installed on the inside vertical panels of the shelves. Small pieces of woods (cleats) are cut to nest securely in the notches between the teeth. These cleats support the
shelves
across their full width, and can be easily re positioned at any height. See picture on the left.
Very simple shelves
Insert a small (or a long) Kinook block in the vertical C-stud and use a 6 mm wooden dowel that will assemble the shelf with the Kinook block (shelf drilled at the 4 corners to insert the dowel).
The advantage of this technique is that the height and level of the shelf can be easily adjusted.
To block the shelf either:
Put a screw in the Kinook block (through thestud).
Pinch or notch the vertical stud to prevent the Kinook block from sliding down.


 In order to be able to install the panels (especially the horizontal panel), do not use shims larger than the panel thickness.