You are a bit of a handyman but you have never built with Kinook blocks. This section is for you. You'll see, it's quite simple,
with a minimum of tools and a few tricks you will quickly master the basics and you will be able to launch into fun constructions.
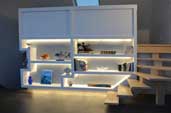
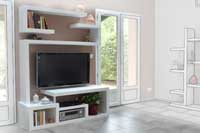
The main advantage of using the Kinook system is that the constructions are easy to build and will be very strong, especially at the junctions (thanks to the metal studs). Find all the advantages of the Kinook system on this page .
Any construction based on the Kinook system includes 3 main steps:
Before starting, a little explanation is needed about the materials we will use for our constructions.
The Kinook system is used with standard metal studs and other materials (screws, plasterboards, etc.) used to build drywall partitions and ceilings made of plasterboard.
All these materials are easily found in DIY stores.
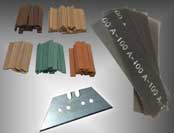
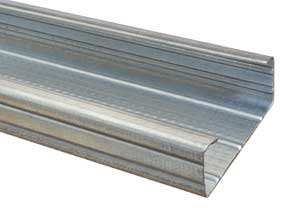
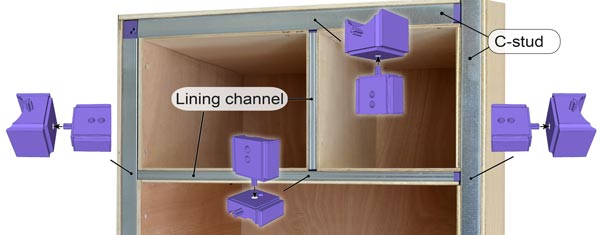
METAL STUDS
To create the metal framework of our constructions, we mainly use two type of studs :
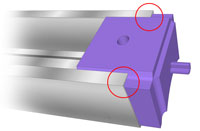
They have a C-shape with small lips which allows the Kinook blocks to slide inside to assemble the studs together.
They are available in different lengths: generally 2.40 m or 3 m.
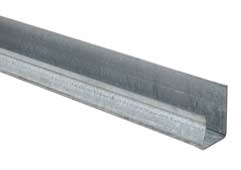
C-stud
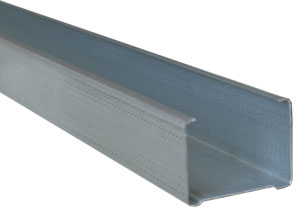
It is the most commonly used stud for Kinook based constructions. It is 48mm wide and 36mm high.
It is used with long and small Kinook blocks.
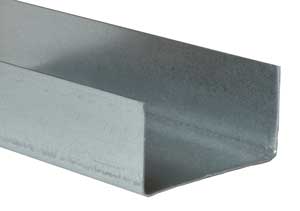
Lining channel
It is used with the mini-block to create thinner structure as it is only 17 mm high.
Depending on the construction, either C-studs or lining channels or both will be used. The choice will be made according to the desired thickness for the construction.
For some specific constructions, two other types of metal stud may be required::
U track
Used with C-studs to:
Wall track
Used with lining channel to :
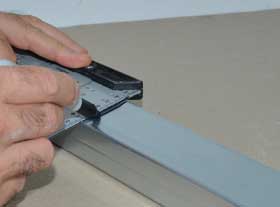
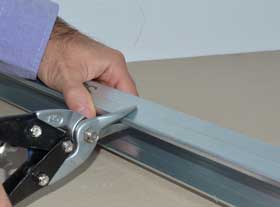
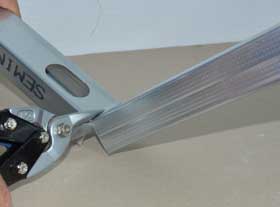
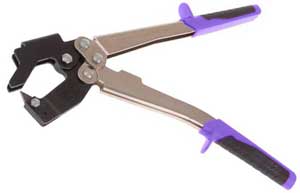
Cutting the studs
Studs can be easily cut with tin snips or a nibbler.
For nibbler cutting, engage the nibbler at the cutting location and advance in small passes.
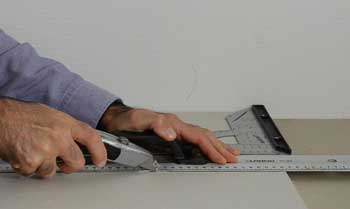
For tin snips cutting, start by marking the location of the cut precisely with a square ruler and a marker. Cut the sides (both), fold the profile at the place of the cut, then finish the cut with the tin snips as shown below.
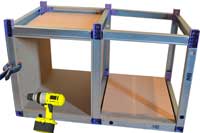
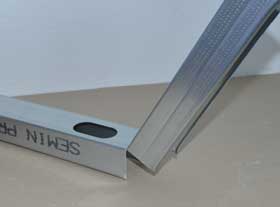
Assembling the studs
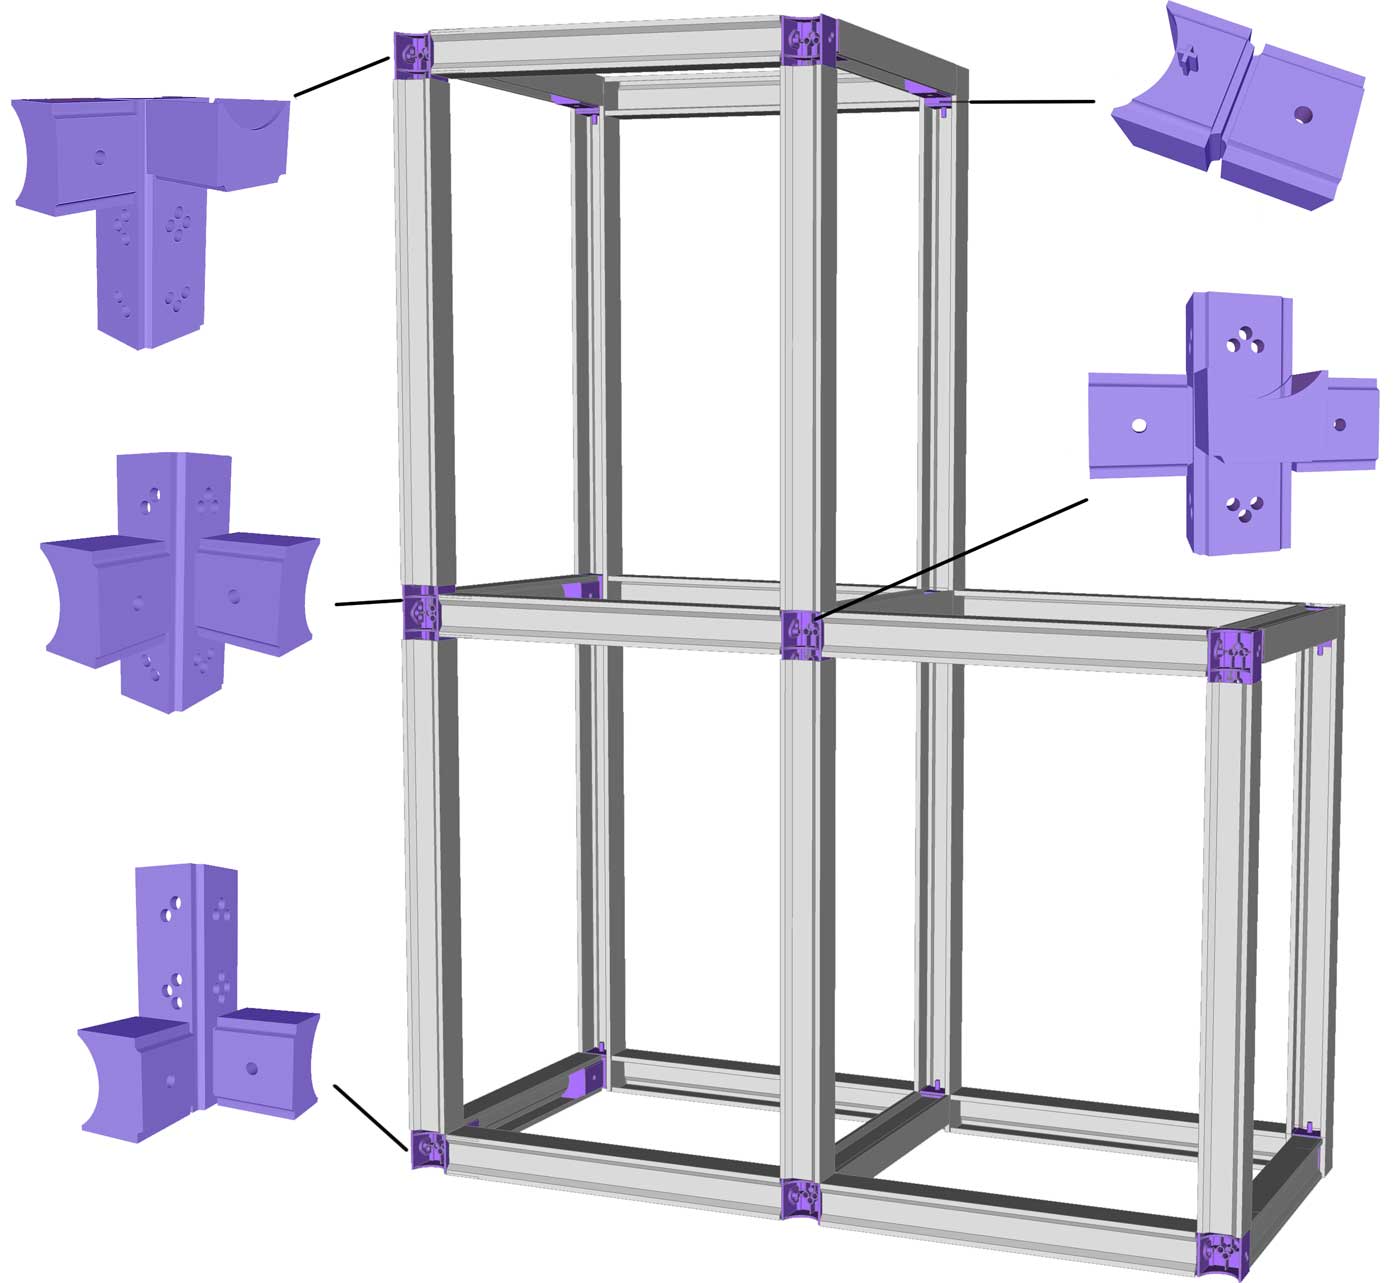
The C-studs (or lining channels) are assembled together with Kinook blocks. As in a game of construction, create T, L, X, etc. shapes with Kinook blocks and slide the C-studs into place.
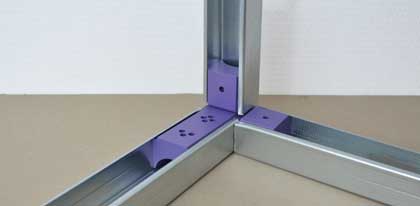
Note that the metal structure will not be stiffened until the panels are screwed in.
Although a little destabilizing at first, this is an advantage because the structure can be adjusted to the dimensions of the panels and thus obtain a perfectly joined assembly. Details on construction
page.
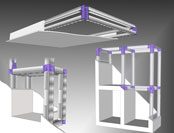
Metal frame examples
C-studs and U-track frame
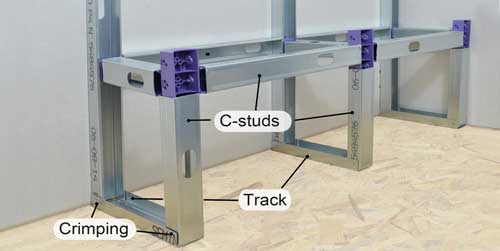
In this example, there are U tracks fixed to the floor on which vertical C-studs have been crimped. The rest of the structure is assembled with Kinook blocks and C-studs.
C-studs and lining channels frame
In this example, the external framework has been created with C-studs, the internal (thinner) shelves are made with lining channels.
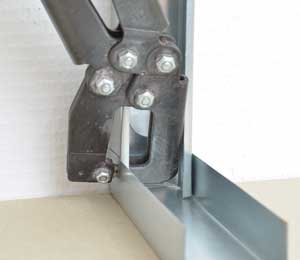
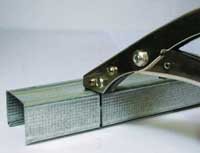
Crimping the studs
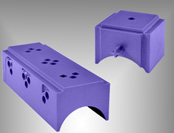
This technique is mainly used to raise the first shelf to leave room for a skirting board as in the construction of this bookcase.
C-studs are crimped to track-studs with a standard stud crimping
tool (Available in any DIY superstore). The tool solidly cramps the two studs together.
SKIN THE METALLIC STRUCTURE
The metallic structure is then covered with panels. Panels can be plasterboard, Fermacell®, wood, melamine, MDF or any other material of your choice. See page select material for the
panels for selecting and sizing the panels.
Plasterboard
Plasterboard (or sheetrock) is easy to find, inexpensive, and easy to cut. It is available in different sheet size and thickness, the most common are 9.5 mm and 12.5 mm thick.
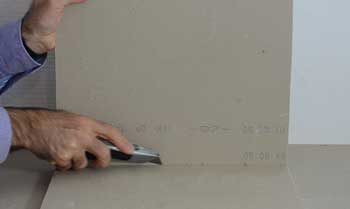
Cutting plasterboard
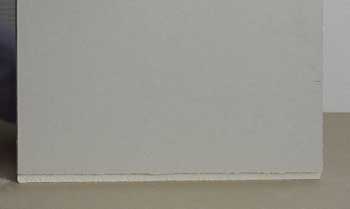
Plasterboard can be easily cut with a sharp trimming knife blade. Score along the line with the knife, and cut all the way through the plasterboard, just deep enough to cut
through the paper (about 3mm). Turn the sheet over and bend firmly one part to about a 90 degree angle. This will break the remaining sheetrock. Cut through the paper on the back side, along the bend where you made the first
cut.
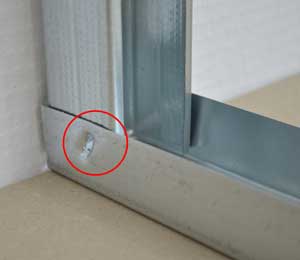
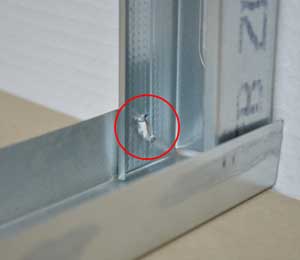
Fixing panels

Panels are fixed to the metallic structure (studs) with special plasterboard screws capable of driving through the metallic stud without having to drill starting holes. These screws can be easily found with plasterboard
accessories and are available in different sizes. Most common size is 25-35 mm long and a diameter of 3.5 mm.
If you are using wood type panel, do not forget to drill a counter-sink hole to hide the screw head.
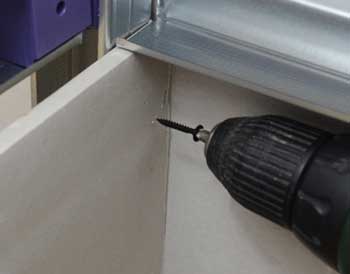
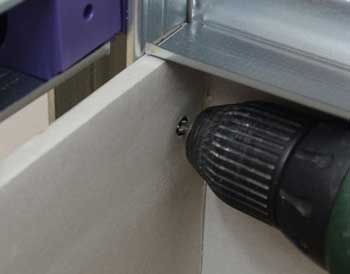
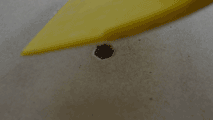
Use an electric drill or screwdriver. Place the screw on the panel and gently press until the screw reaches the stud. At this point, press firmly (and hold the metallic structure)
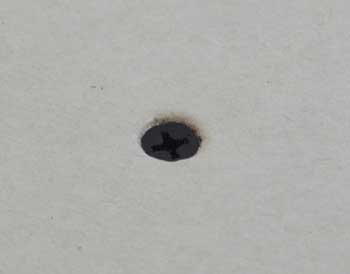
until the screw perforates the studs, release pressure. The screw heads need to finish just under the surface of the board (1mm) as shown below.
HINTS
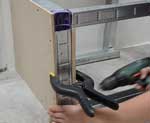
when screwing the panel boards, use plastic pliers to hold them firmly to the metal structure.
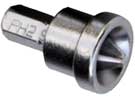
Use a screw head depth limiter to avoid damaging the plasterboard by screwing too deep into the panel.
FINISHING
Start by plugging every hole and crack with compound.
Sand, then apply a finishing compound. Sand lightly before painting.
For more details, check our finishing page
MORE RESSOURCES
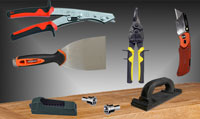
Usefull tools
|